Turning 2D character artwork into a production-ready custom plush toy often becomes difficult when a brand only provides one flat image and expects a factory to “match it.” That gap creates revisions, delays, and avoidable cost. The practical solution is to prepare artwork as a real manufacturing brief, not just a design reference.
A production-ready custom plush toy starts with complete artwork, clear character priorities, and early supplier feedback. A manufacturer usually needs multi-view references, size intent, detail placement, material direction, and construction decisions before sampling can move efficiently. The goal is not to copy a flat drawing exactly, but to preserve character recognition in stable 3D plush form.
When I review customer artwork for plush development, I usually see the same pattern. The strongest projects are not always the most complex characters. They are the best-prepared files. Once the missing 3D information is clarified early, sampling becomes faster, cleaner, and easier to evaluate.
What Artwork Files Does a Plush Toy Manufacturer Need?
A plush project often slows down before sampling even starts. Many teams send one beautiful front-view illustration, but that image does not explain volume, hidden details, or how parts connect. The fix is simple: provide artwork that supports 3D interpretation, not just visual inspiration.
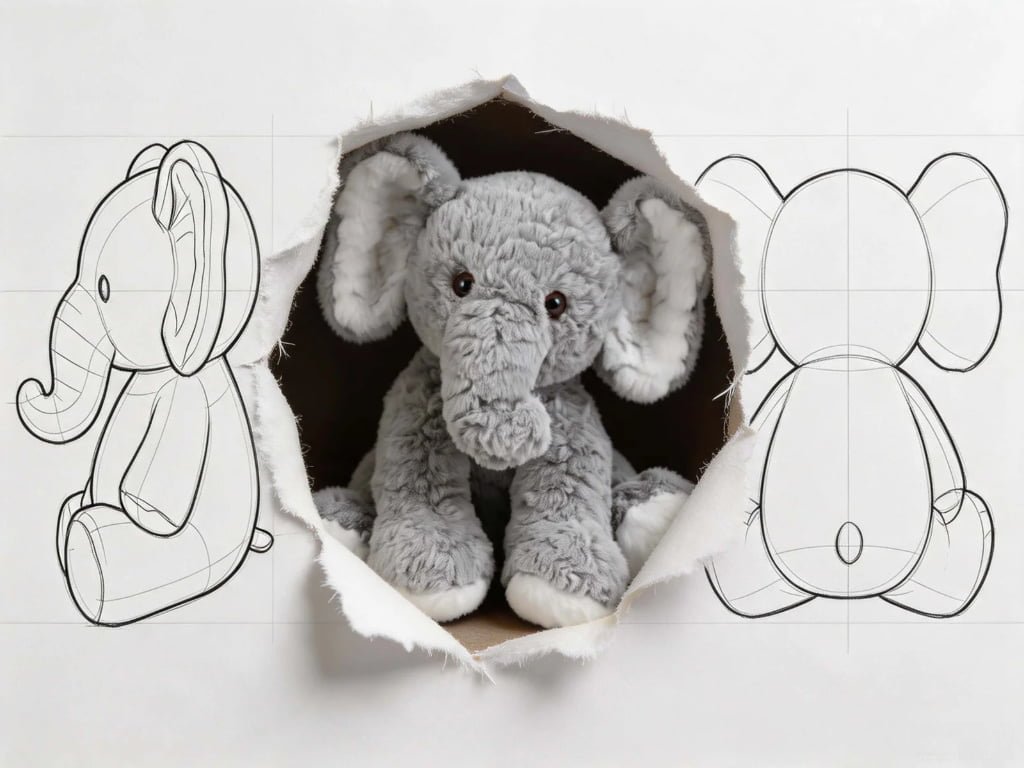
A plush toy manufacturer usually needs front, side, and back views, plus close-ups of key details, color references, target size, and notes on materials or accessories.[^1] These files reduce guesswork and help the supplier assess whether the design can become a production-ready custom plush toy with fewer revisions.
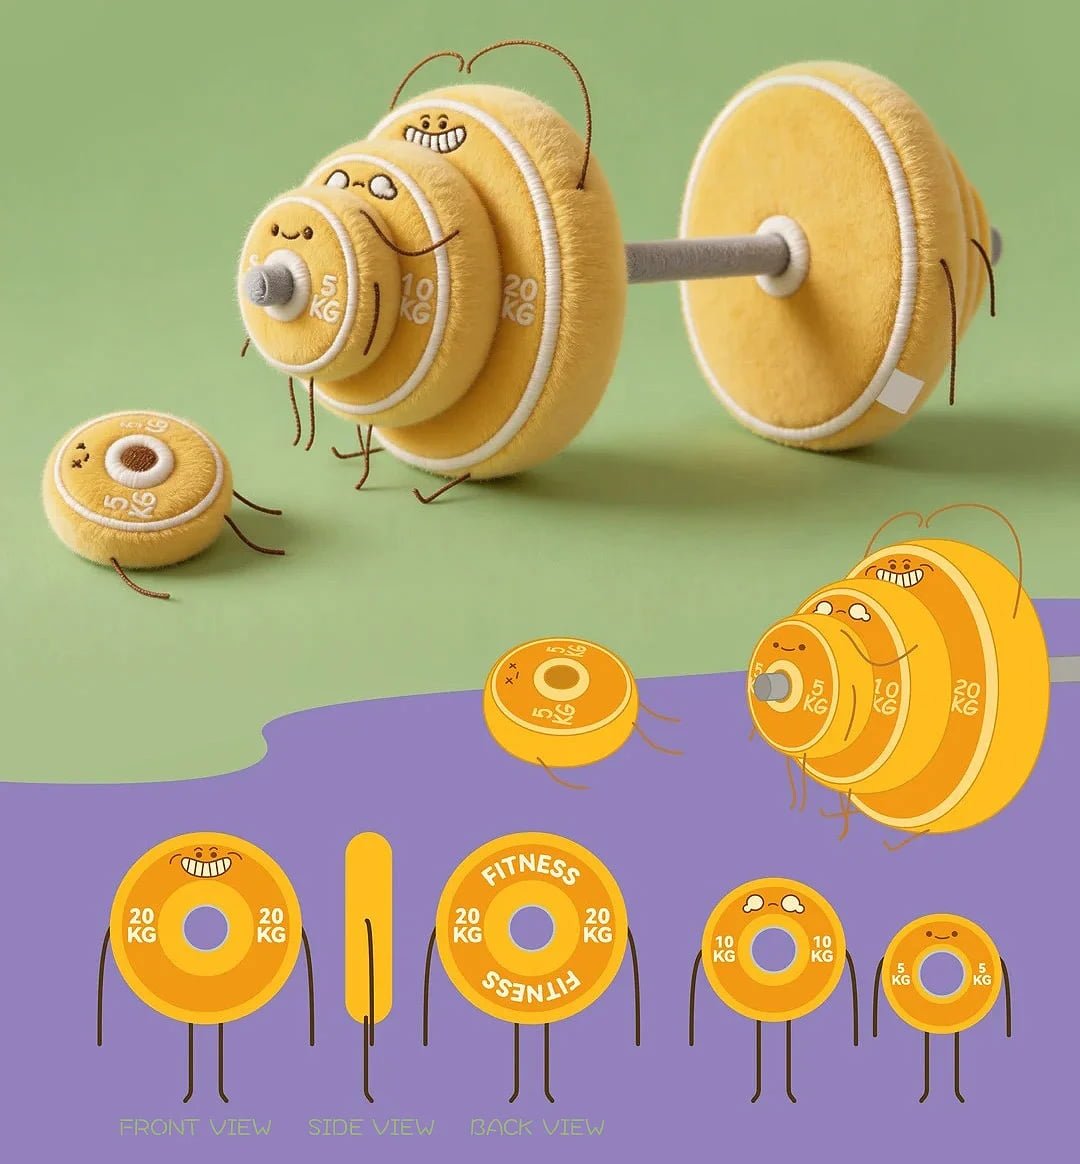
When I evaluate a new plush inquiry, I do not treat the artwork as a finished production specification. I treat it as the starting point for technical clarification. That distinction matters. A single front view can show expression and style, but it cannot fully show depth, seam logic, tail placement, head shape, or how asymmetrical details should appear from other angles.
Essential artwork inputs
In most projects, I recommend buyers prepare these files or references:
- Front view
- Side view
- Back view
- Three-quarter view if available
- Close-up detail sheets for face, hands, feet, accessories, and logos
- Color references such as Pantone codes or approved digital color targets
- Size intent such as sitting height, overall height, or body width
- Notes on must-keep features that define recognition
- Accessory references for scarves, hats, capes, bags, or tags
- Material direction if the brand already knows preferred fabric types
Why one front view is not enough
A front view does not answer questions like these:
- Is the head a sphere, oval, or flattened shape?
- Does the body project forward or stay flat?
- How thick are the arms and legs?
- Is the tail centered, angled, stuffed, or flat?
- Are ears symmetrical from the back?
- Do hair pieces sit as separate plush parts or printed surface graphics?
In my experience, most repeat revisions do not come from “bad sewing.” They come from missing decisions in the original artwork package.
Helpful file types for buyers
Here is a simple way to think about file usefulness:
| File Type | Best Use | Why It Helps |
|---|---|---|
| AI / EPS / SVG | Vector artwork | Makes line details and separations clearer |
| PSD | Layered artwork | Helps isolate facial features, clothing, and accessories |
| Review and sharing | Easy for approvals and internal circulation | |
| JPG / PNG | Visual reference | Fine for preview, but weaker for technical use alone |
| Pantone reference | Color control | Reduces color interpretation risk |
What I would send before asking for a quote or sample
If I were preparing a plush character for development, I would send:
- A full character sheet with at least 3 views.
- A marked-up file showing must-preserve character traits.
- Approximate intended size.
- Notes on target market and any safety or compliance expectations that need verification.
- Reference photos of similar plush styles I like, if relevant.
This preparation reduces commercial risk before sampling begins. It helps the supplier quote more accurately, identify likely problem areas early, and recommend practical changes before time and money are spent on avoidable sample loops.
How Is a 2D Character Converted into a Plush Sewing Pattern?
A flat drawing can look complete, but it still lacks construction logic. Buyers often assume the supplier only needs to “trace the shape.” In reality, turning artwork into a production-ready custom plush toy means translating appearance into panels, seams, volume, and stuffing behavior.
A 2D character is converted into a plush sewing pattern by interpreting its 3D form, splitting the shape into sewable fabric panels, assigning seam locations, and adjusting proportions where necessary for stability and recognizability. The pattern must support both the approved look and repeatable manufacturing.
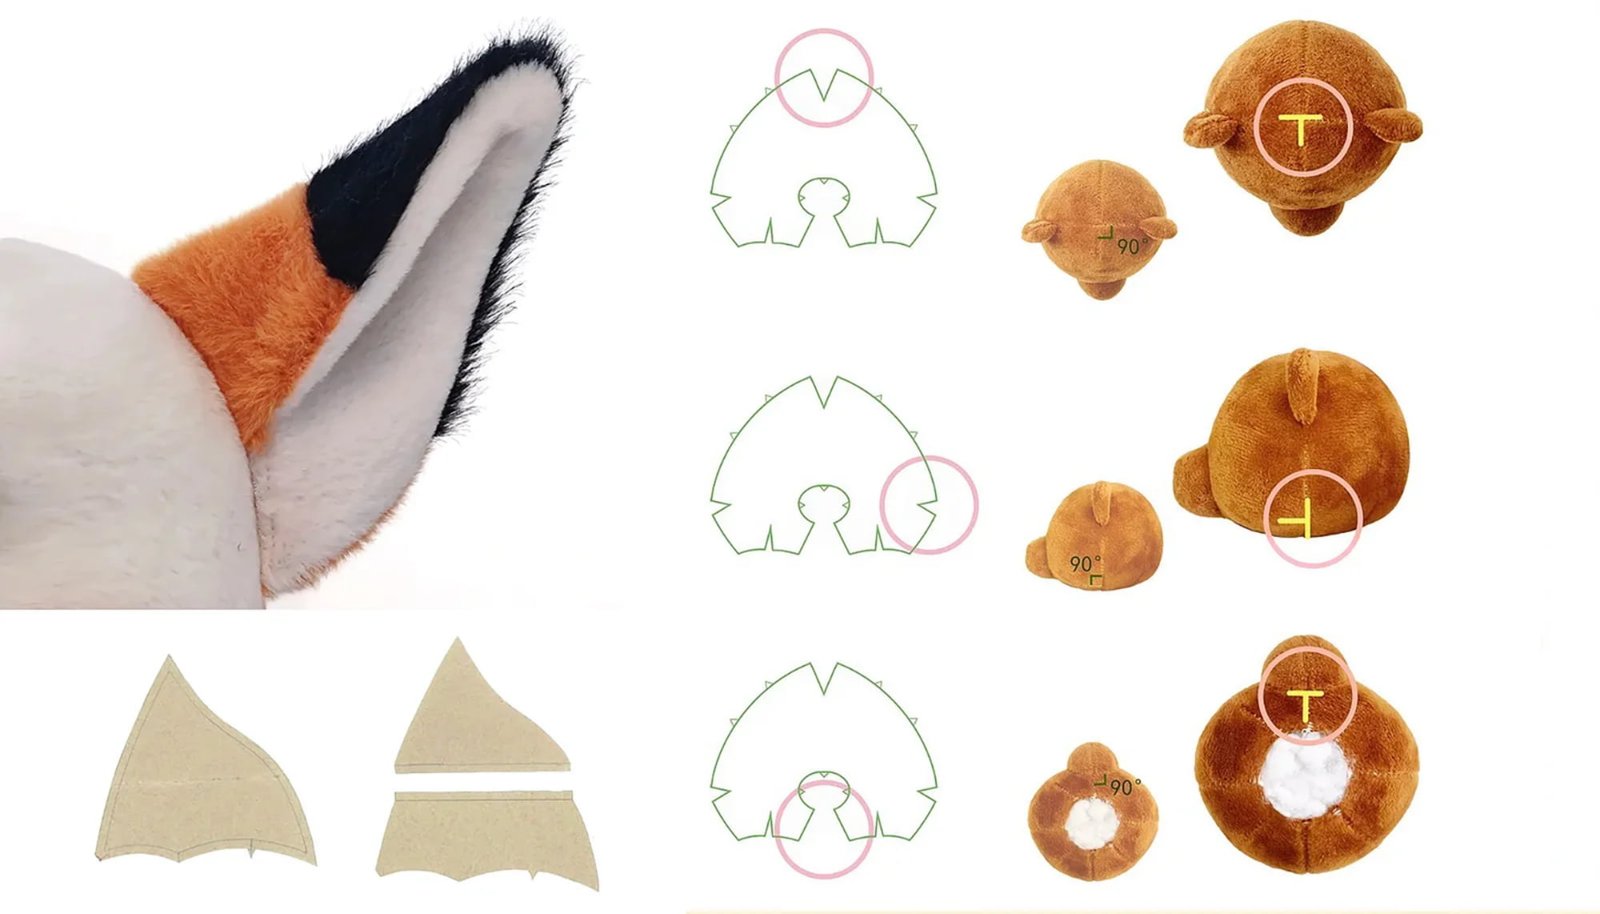
This is the stage where an experienced supplier adds value long before bulk production. I have seen many drawings that look simple on screen but become technically tricky in plush form. Thin limbs, oversized heads, floating costume layers, and highly graphic hair shapes often require judgment calls. The goal is not blind fidelity to the front view. The goal is preserving how the character is recognized in 3D.
Step 1: Interpret the character’s volume
The team first has to understand what the drawing implies:
- Head depth
- Body width versus thickness
- Limb attachment angles
- Ear or horn orientation
- Belly projection
- Tail structure
- Whether some details are padded, flat, or layered
If the artwork does not answer these points, the supplier should ask. That is not a delay. That is good development practice.
Step 2: Break the form into manufacturable panels
A plush toy pattern is usually made of separate sewn pieces. These might include:
- Head center panel
- Side head panels
- Front body and back body
- Arm and leg pairs
- Gussets
- Ear layers
- Tail panels
- Clothing pieces
- Applique parts
Each panel must be shaped so that, once sewn and stuffed, the toy creates the intended volume.[^3] A flat line in artwork often becomes a curved seam in reality.
Step 3: Adjust for 3D recognition
This is where many brand teams need reassurance. Adjustment does not automatically mean inaccuracy. Some controlled changes are often necessary so the plush still “reads” correctly.[^4]
Common adjustment examples
- Eyes may be slightly enlarged so the face remains expressive after stuffing.
- Arms may be thickened for sewing strength and consistency.
- Head-to-body ratio may shift slightly so the silhouette matches the character from multiple angles.
- Small pointed elements may be softened because sharp geometry does not translate well in plush.
These are project-specific judgments, not universal rules. A capable factory should explain the reason for each recommendation.
Step 4: Test the pattern through sampling
The first sample checks whether the pattern interpretation actually works. At this point, the team evaluates:
- Character recognition
- Side profile
- Standing or sitting balance
- Seam visibility
- Surface detail placement
- Stuffing fullness
- Accessory construction
Here is a useful comparison:
| Artwork Element | Flat Design Intent | Plush Pattern Reality |
|---|---|---|
| Face shape | Clean outline | Must account for stuffing expansion |
| Limbs | Thin drawn shapes | Need minimum width for sewing |
| Hair spikes | Sharp graphic edges | Often simplified or layered |
| Outfit lines | Flat color blocks | May become applique, print, or separate fabric parts |
In my work, the best sampling discussions happen when the buyer and factory talk about which features drive recognition. Once that list is clear, the pattern maker can make smart compromises without losing the character.
Which Character Details Should Use Embroidery, Printing, or Applique?
Detail decisions often create hidden risk. Buyers may focus on artwork accuracy, but not every graphic feature should be built the same way. The wrong decoration method can affect appearance, cost, durability, and sampling efficiency.
Embroidery, printing, and applique each suit different plush details.[^5] Embroidery works well for clean facial features and small lines. Printing suits gradients or complex surface graphics. Applique fits bold layered shapes and color blocking. The best choice depends on scale, fabric, texture, and the needs of a production-ready custom plush toy.
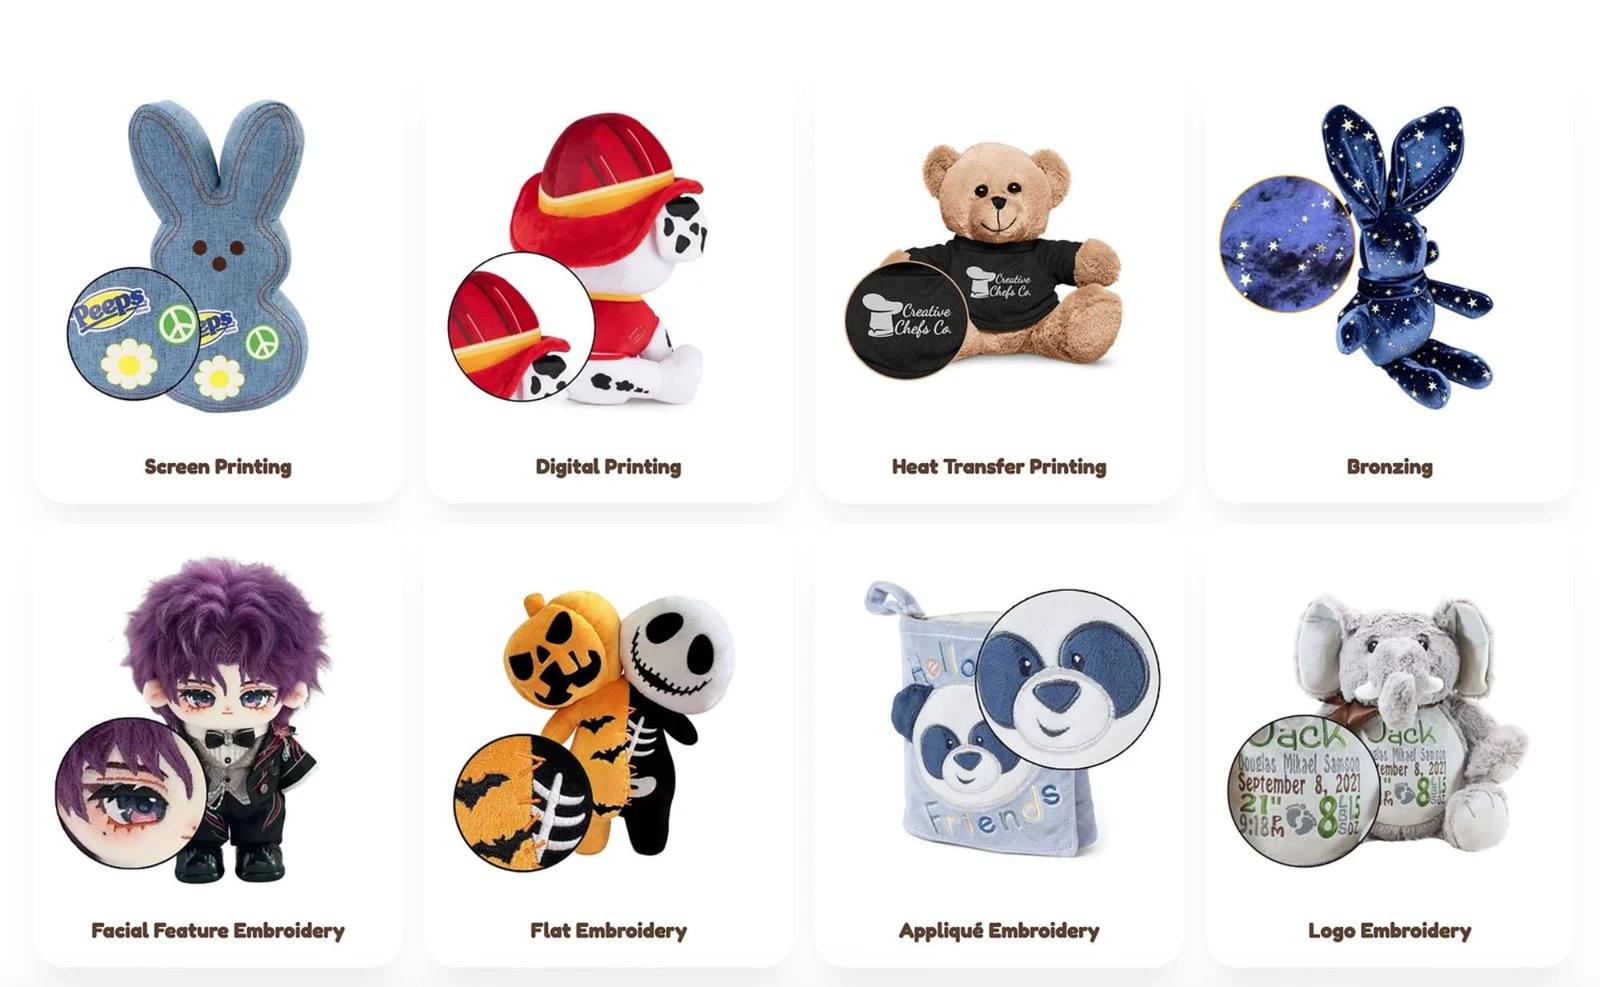
When I review a character sheet, I usually separate the design into structural parts and surface parts. That helps prevent overbuilding. Some brands initially assume every visual element should become a sewn part. In practice, that can make the toy more expensive, less stable, or visually crowded.
When embroidery works best
Embroidery is often a strong choice for:
- Eyes
- Eyebrows
- Mouth lines
- Small symbols
- Simple costume lines
- Fine outlines
Advantages:
- Clean and consistent
- Good for repeat production
- Usually durable
- Strong for smaller details
Limits:
- Not ideal for soft gradients
- Can look dense on very fluffy fabric
- Tiny details may still need simplification
When printing works best
Printing may be better for:
- Blush effects
- Complex patterns
- Multi-color facial gradients
- Detailed costume graphics
- Repeating surface motifs
Advantages:
- Handles more visual complexity
- Good for color transitions
- Avoids too many sewn layers
Limits:
- Fabric texture can affect clarity
- Print consistency should be checked on actual plush fabric
- Some markets may require extra review of print durability and safety documentation
When applique works best
Applique is useful for:
- Belly patches
- Large eye whites
- Big logos
- Costume panels
- Contrasting shapes with clear edges
Advantages:
- Strong graphic readability
- Good dimension and separation
- Often closer to bold cartoon styling
Limits:
- Adds seams and labor
- Very small applique shapes can be difficult
- Excessive layering can stiffen the surface
A practical selection framework
I often think about detail choices this way:
| Detail Type | Best Default Method | Why |
|---|---|---|
| Small facial line | Embroidery | Precision and consistency |
| Gradient cheek color | Printing | Better color transition |
| Large contrasting belly patch | Applique | Clear shape and visual impact |
| Tiny logo text | Depends on size | May need print instead of embroidery |
| Costume pattern all over body | Printing | More efficient than many cut pieces |
What buyers should confirm
Before approving detail methods, I would confirm:
- Visual effect on the chosen fabric
- Whether pile length affects clarity
- Consistency in bulk production
- Any market-specific compliance documents that should be verified
- Whether the chosen method changes cost or minimum order logic
One lesson I learned early is that a beautiful screen design can fail on plush if the surface method is wrong. Good suppliers should flag that before the sample stage goes too far.
How Many Sample Revisions Are Usually Needed?
Sampling often becomes frustrating when buyers expect one prototype to solve everything. Most custom plush projects need revisions, especially when artwork lacks complete 3D guidance. The real question is not how to avoid revisions entirely, but how to reduce unnecessary ones.
Most custom plush developments require one to several sample revisions depending on artwork completeness, character complexity, and approval standards.[^6] A project with strong multi-view references and clear priorities often moves faster. A project based on incomplete artwork usually needs more clarification before it becomes a production-ready custom plush toy.
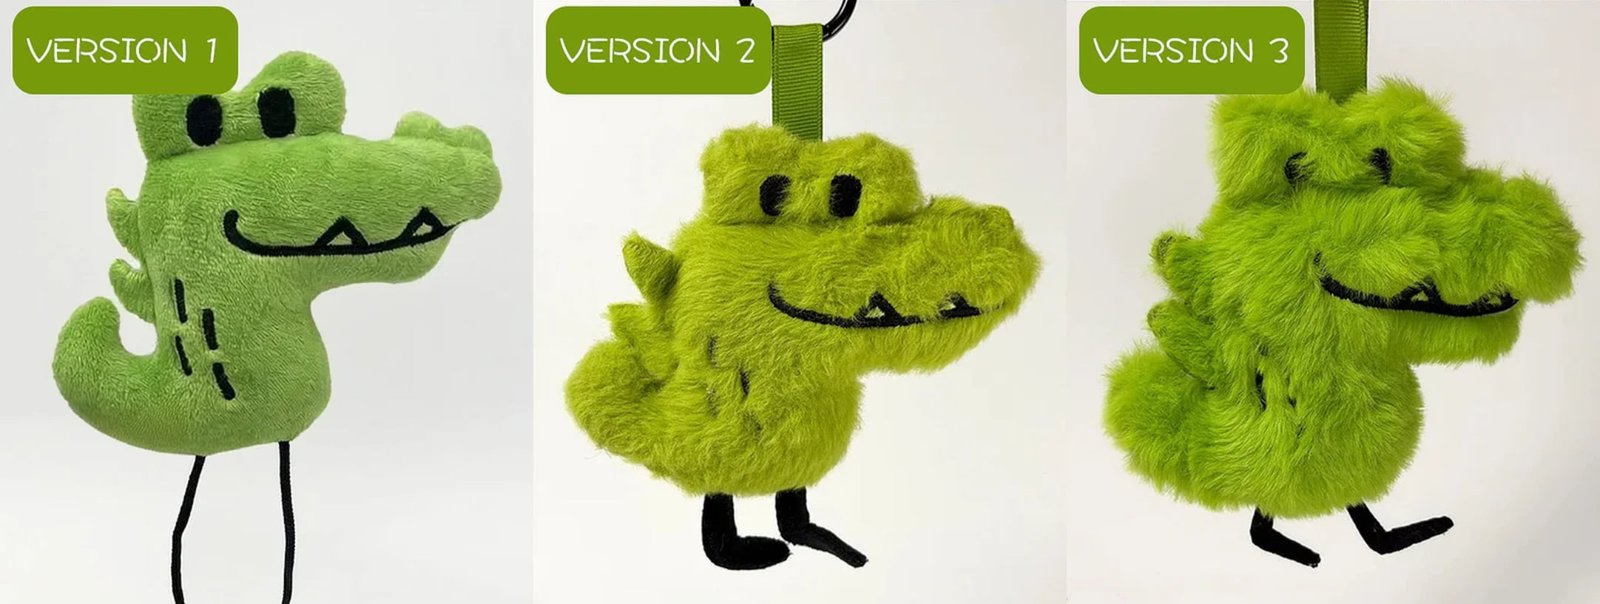
I try to set realistic expectations early. A first sample is usually a test of interpretation, not proof that every issue is solved.[^7] It shows how the character behaves in fabric, stuffing, and construction. That is very different from viewing polished concept art on a screen.
What usually drives extra sample rounds
The most common reasons include:
- Missing side or back references
- Unclear priorities between shape, expression, and accessory detail
- Character proportions that do not translate directly into plush
- Last-minute material changes
- New safety or packaging requirements introduced mid-project
- Buyer feedback that is broad rather than specific
For example, “make it cuter” is hard to execute. “Reduce snout length by 10% and raise eye position slightly” is actionable.
Typical revision patterns
Here is a general framework buyers can use:
| Revision Round | Main Purpose |
|---|---|
| First sample | Validate 3D interpretation and major shape |
| Second sample | Refine proportions, face placement, and details |
| Further sample(s) | Confirm final adjustments and production method |
This is not a guaranteed formula. Some simple mascots move quickly. Some layered IP characters need more development. The point is that revision count usually reflects decision quality upfront, not just factory performance.
How buyers can reduce revision risk
I recommend these practices:
- Provide a ranked list of must-keep features
- Mark correction feedback directly on sample photos
- Keep one consolidated feedback document
- Avoid conflicting comments from multiple internal teams
- Confirm whether requested changes affect cost or lead time
- Ask the supplier to explain any recommended deviation from the original artwork
Visual approval is not production readiness
This distinction is important. A sample can look close enough for brand review but still need final confirmation on:
- Pattern stability
- Material availability
- Embroidery consistency
- Accessory attachment method
- Packaging fit
- Carton plan
- Safety and compliance document verification where needed
I have seen teams approve a prototype emotionally because it “looks right,” then discover later that some details are not yet stable for mass production. That is why disciplined approval gates matter.
What Should Buyers Approve Before Mass Production?
A plush sample can feel finished too early. That creates risk. Buyers who approve only the toy’s appearance may miss issues that affect consistency, lead time, or large-order quality. A production-ready custom plush toy needs more than visual sign-off.
Before mass production, buyers should approve the final sample appearance, key dimensions, materials, colors, decoration methods, construction details, labeling, packaging, and any required compliance documents for verification.[^8] They should also confirm what tolerances and quality checkpoints will be used during production.
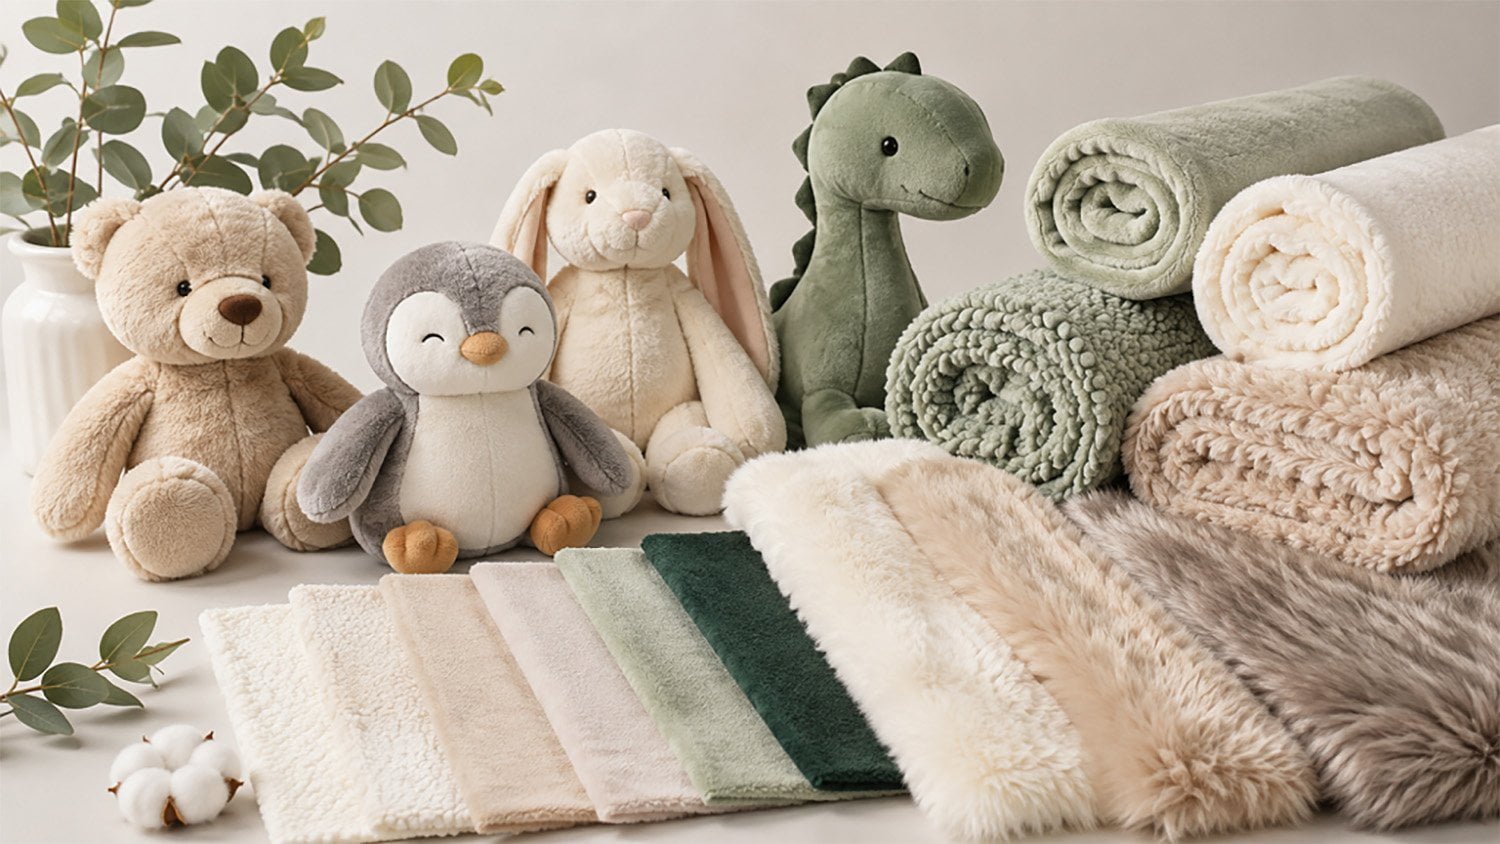
This stage is where procurement discipline protects brand outcomes. In B2B plush sourcing, I do not think of approval as one signature. I think of it as a controlled handoff from development into repeatable manufacturing.
Core approval checklist
I would usually confirm the following:
1. Approved sample standard
The factory and buyer should agree which physical sample is the reference standard.
2. Dimensions and tolerances
Buyers should confirm:
- Overall height
- Sitting height if relevant
- Width and depth
- Acceptable variance ranges
3. Fabric and filling
Buyers should verify:
- Main fabric type
- Pile length or texture
- Filling type
- Any substitutions allowed if sourcing changes
4. Surface detail method
Every key graphic element should be confirmed as:
- Embroidery
- Printing
- Applique
- Separate sewn part
5. Color standard
A color target should be linked to:
- Fabric swatches
- Thread colors
- Print references
- Trim colors
6. Accessories and attachments
This includes:
- Scarves
- Hang tags
- Keychain hardware
- Plastic parts
- Decorative trims
These elements may require extra review depending on the intended market and age grading.[^9] Buyers should verify documentation and seek qualified evaluation for application-specific compliance decisions.
7. Labeling and packaging
Confirm:
- Woven labels
- Wash labels
- Origin marking
- Polybag needs
- Barcode labels
- Master carton requirements
Production control questions buyers should ask
Before placing the full order, I would ask:
- What in-line quality checks will be used?
- Which details are most likely to vary in bulk?
- How will the factory control embroidery placement and face consistency?
- What is the standard for packed approval?
- Will there be pre-production sample confirmation if materials change?
Why this matters commercially
Approval discipline reduces:
- Rework
- Disputes over sample versus bulk
- Delayed shipment
- Hidden cost from late corrections
- Inconsistent brand presentation at retail
At CudoraToy, based on our OEM/ODM manufacturing experience, this pre-production clarification stage often determines whether a project runs smoothly or becomes correction-heavy. Strong suppliers do not just wait for instructions. They identify gaps, ask targeted questions, and help buyers move from artwork approval to manufacturing readiness with fewer surprises.
Frequently Asked Questions
Can I develop a plush toy from only a front-view character image?
You can start a discussion with a front view, but it is usually not enough for efficient development. A supplier will likely need side, back, and detail references to reduce guesswork, revisions, and pattern interpretation risk.
Does a more detailed character always make a better plush toy?
Not always. Some highly detailed designs need selective simplification to stay recognizable, manufacturable, and consistent in bulk. The best result usually comes from preserving the details that drive character recognition, not every flat graphic element.
Is the first sample usually close to final production?
Sometimes it is visually close, but buyers should not assume it is fully production-ready. The first sample often validates shape and interpretation. Materials, detail methods, tolerances, and repeatability still need confirmation before mass production.
How do I know whether a detail should be embroidered or printed?
The decision depends on the detail size, fabric texture, color complexity, and desired look. Embroidery suits clean lines, printing suits complex graphics, and applique suits bold layered shapes. A supplier should review these choices on the actual plush fabric.
What is the biggest mistake buyers make before plush sampling?
The biggest mistake is treating artwork as complete when key 3D information is missing. That usually causes repeated clarification, sample revisions, avoidable cost, and slower project timelines.
Conclusion
A production-ready custom plush toy does not begin with sewing. It begins with better artwork preparation, clearer 3D intent, and smarter supplier communication. In my experience, the strongest plush projects come from buyers who define must-keep character features, provide multi-view references, and review prototypes with manufacturing reality in mind. If you are preparing an IP character, mascot, or branded plush concept for OEM/ODM development, contact CudoraToy to discuss your artwork, sampling goals, and supplier evaluation needs before production begins.
[^1]: "TY: Toy Design - Courses", https://catalog.fitnyc.edu/undergraduate/courses/ty/. A technical guide to soft-toy or sewn-product pattern development supports the use of multiple views, dimensions, and detail references when translating a two-dimensional design into a three-dimensional construction. Evidence role: general_support; source type: education. Supports: An educational or technical source should explain that multiple orthographic or perspective views and dimensional references help convert a visual character concept into a three-dimensional sewn product.. Scope note: Such guidance describes good development practice rather than proving that every manufacturer requires the same file package. [^2]: "The Hidden Cost of Slow Product Development (And How ...", https://deepwear.info/blog/the-hidden-cost-of-slow-product-development-and-how-leading-brands-avoid-it/. Research on design-for-manufacturing indicates that unresolved design requirements can generate rework and additional prototype iterations before production specifications stabilize. Evidence role: mechanism; source type: research. Supports: Research on design-for-manufacturing and product-development rework should support the mechanism by which incomplete specifications create clarification, redesign, and additional prototyping work.. Scope note: Evidence from apparel or general product development may not quantify the same effects specifically for custom plush toys. [^3]: "Build A Soft Sculpture! | Crafts Center", https://crafts.arts.ncsu.edu/build-a-soft-sculpture-2/. Textile pattern-engineering literature supports the principle that the geometry of joined fabric panels determines the resulting three-dimensional form, including the volume available for filling. Evidence role: mechanism; source type: research. Supports: A textile or soft-product engineering source should explain how two-dimensional pattern pieces become three-dimensional forms through joining, shaping, and filling.. Scope note: The source may address garments, soft sculptures, or other sewn products rather than the specific geometry of plush toys. [^4]: "Facial features of cartoon characters and their perceived ...", https://pmc.ncbi.nlm.nih.gov/articles/PMC11707146/. Studies of visual recognition and shape abstraction indicate that observers can identify stylized characters from salient structural and facial cues, supporting selective adaptation when a flat design is converted into a three-dimensional object. Evidence role: mechanism; source type: paper. Supports: Perception research should support the idea that recognition can depend on a limited set of salient visual features and that preserving those features may matter more than literal reproduction of every contour.. Scope note: Perceptual findings do not establish a universal rule for which features must be changed in a particular plush design. [^5]: "Textile/Surface Design - Fashion Institute of Technology", https://www.fitnyc.edu/academics/academic-divisions/art-and-design/textile-surface-design/index.php. Textile surface-design references distinguish embroidery, printing, and applique by their methods of depositing or attaching decorative elements, supporting their use for different visual and structural requirements. Evidence role: general_support; source type: education. Supports: A textile-design or manufacturing source should compare the construction, visual, and material characteristics of embroidery, printing, and applique.. Scope note: Method suitability remains dependent on fabric type, scale, equipment, production volume, and the specific artwork. [^6]: "Design prototyping methods: state of the art in strategies ...", https://scholarworks.sjsu.edu/cgi/viewcontent.cgi?article=1015&context=mech_eng_pub. A relevant product-development study or industry survey may document that prototype iteration is common and that incomplete requirements and design complexity are associated with additional development cycles. Evidence role: statistic; source type: research. Supports: A survey, case series, or product-development study should provide evidence about prototype iteration frequency and factors associated with additional revisions.. Scope note: Without a plush-specific dataset, the source cannot substantiate the article’s exact frequency wording for custom plush projects. [^7]: "Production Readiness Review (PRR) | Adaptive Acquisition ...", https://aaf.waru.edu/aaf/mca/prr/. Product-development research distinguishes exploratory prototypes, which test design interpretation and function, from later validation activities required to establish repeatable production requirements. Evidence role: general_support; source type: research. Supports: Product-development literature should support the distinction between an early prototype used to test design assumptions and a validated production specification.. Scope note: Prototype terminology and approval gates vary across manufacturers and product categories. [^8]: "Toy Safety Business Guidance | CPSC.gov", https://www.cpsc.gov/Business--Manufacturing/Business-Education/Toy-Safety. Government toy-safety and conformity-assessment guidance supports verifying the finished product, relevant materials, markings, and required technical documentation before market placement or commercial release. Evidence role: expert_consensus; source type: government. Supports: Government toy-safety and conformity-assessment guidance should support the need to verify product characteristics, labeling, documentation, and applicable requirements before placing products on the market.. Scope note: Requirements differ by jurisdiction, product classification, intended age group, and sales channel; the source may not prescribe a universal buyer approval checklist. [^9]: "Toy Safety Business Guidance | CPSC.gov", https://www.cpsc.gov/Business--Manufacturing/Business-Education/Toy-Safety. Official toy-safety guidance indicates that age grading and detachable or small components can affect applicable safety assessments, warnings, and documentation for toys. Evidence role: definition; source type: government. Supports: Official toy-safety guidance should define how age grading, detachable components, small parts, and destination-market rules affect review requirements.. Scope note: The exact obligations depend on the destination jurisdiction and cannot be inferred from a general statement alone.